Firebase | Step 4: Write user-generated data
BEFORE
| You should… | What to Review |
|---|---|
| …be able to view and edit the provided code samples on your computer. | Step 3 |
| …be able to write hard-coded data to your Firebase database using the Javascript library. | Step 3 |
| …know your-project-id, the unique description of your database. | Step 1 |
| …understand the basics of how clients (like websites) interact with a backend to access data. | What is a backend and why do I need one? |
DURING
What happens if you refresh application.html in your browser?
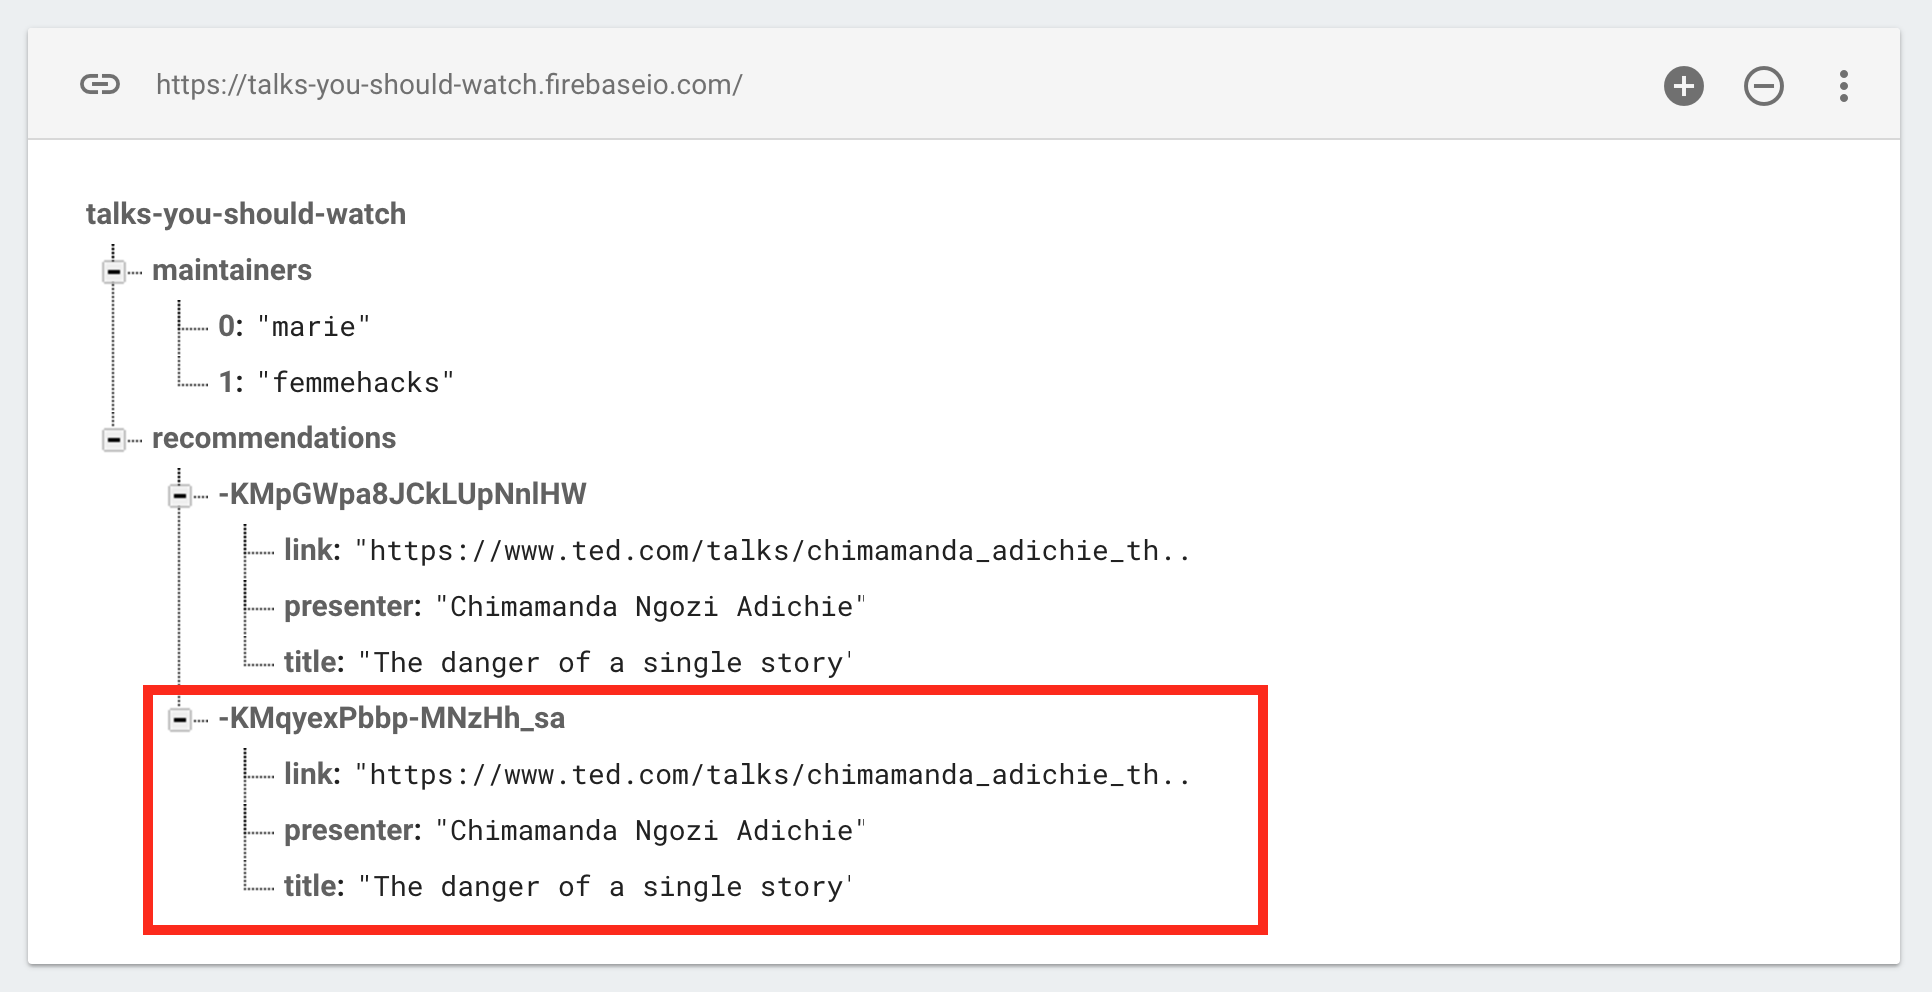
It adds the exact same object to your Firebase database! Again. That’s kind of cool. But it’s also a bit pointless.
We can keep refreshing this page forever but it’s just going to keep adding the exact same recommendation to our database over and over again. We probably want users to be able to give us some data. So let’s make a form!
Go ahead and open up application.html and application.js from the code_samples/v2 directory.
Need a refresher on how to download these files? Check out Step 3 — but make sure you download the v2 versions.
application.html
<html>
  <head>
    <!-- Load the Firebase library before loading the body. -->
    <script src="https://www.gstatic.com/firebasejs/3.1.0/firebase.js"></script>

    <!-- Load the jQuery library, which we'll use to manipulate HTML elements with Javascript. -->
    <script src="https://code.jquery.com/jquery-2.2.0.min.js"></script>

    <!-- Load Bootstrap stylesheet, which will is CSS that makes everything prettier and also responsive (aka will work on all devices of all sizes). -->
    <link rel="stylesheet" href="https://maxcdn.bootstrapcdn.com/bootstrap/3.3.6/css/bootstrap.min.css" integrity="sha384-1q8mTJOASx8j1Au+a5WDVnPi2lkFfwwEAa8hDDdjZlpLegxhjVME1fgjWPGmkzs7" crossorigin="anonymous">
  </head>

  <body>
    <!-- Load the application script, which will save data to our Firebase app when we click the button. -->
    <script src="application.js"></script>

    <div class="container">
      <h1>Talks You Should Watch</h1>

      <h3>Submit a Talk</h3>

      <form id="recommendationForm">
        <div class="form-group">
          <label for="talkTitle">Title</label>
          <input class="form-control" id="talkTitle" placeholder="Title of the talk">
        </div>

        <div class="form-group">
          <label for="talkPresenter">Presenter</label>
          <input class="form-control" id="talkPresenter" placeholder="Name of the presenter">
        </div>

        <div class="form-group">
          <label for="talkLink">Link</label>
          <input type="url" class="form-control" id="talkLink" placeholder="Link to a recording of the talk">
        </div>

        <!-- When you click this button, trigger the submit event on this form. -->
        <button type="submit" class="btn btn-default">Submit</button>
      </form>
    </div>
  </body>
</html>
Most of this is the same as v1/application.html.
In the <head>, we load a few more static assets:
    <!-- Load the jQuery library, which we'll use to manipulate HTML elements with Javascript. -->
    <script src="https://code.jquery.com/jquery-2.2.0.min.js"></script>

    <!-- Load Bootstrap stylesheet, which will is CSS that makes everything prettier and also responsive (aka will work on all devices of all sizes). -->
    <link rel="stylesheet" href="https://maxcdn.bootstrapcdn.com/bootstrap/3.3.6/css/bootstrap.min.css" integrity="sha384-1q8mTJOASx8j1Au+a5WDVnPi2lkFfwwEAa8hDDdjZlpLegxhjVME1fgjWPGmkzs7" crossorigin="anonymous">
And in the <body>, we add a form:
    <div class="container">
      <h1>Talks You Should Watch</h1>

      <h3>Submit a Talk</h3>

      <form id="recommendationForm">
        <div class="form-group">
          <label for="talkTitle">Title</label>
          <input class="form-control" id="talkTitle" placeholder="Title of the talk">
        </div>

        <div class="form-group">
          <label for="talkPresenter">Presenter</label>
          <input class="form-control" id="talkPresenter" placeholder="Name of the presenter">
        </div>

        <div class="form-group">
          <label for="talkLink">Link</label>
          <input type="url" class="form-control" id="talkLink" placeholder="Link to a recording of the talk">
        </div>

        <!-- When you click this button, trigger the submit event on this form. -->
        <button type="submit" class="btn btn-default">Submit</button>
      </form>
    </div>
application.js
// TODO: Replace with your project's config object. You can find this
// by navigating to your project's console overview page
// (https://console.firebase.google.com/project/your-project-id/overview)
// and clicking "Add Firebase to your web app"
var config = {
  apiKey: "<your-api-key>",
  authDomain: "<your-project-id>.firebaseapp.com",
  databaseURL: "https://<your-project-id>.firebaseio.com",
  storageBucket: "<your-project-id>.appspot.com",
};

// Initialize your Firebase app
firebase.initializeApp(config);

// Reference to the recommendations object in your Firebase database
var recommendations = firebase.database().ref("recommendations");

// Save a new recommendation to the database, using the input in the form
var submitRecommendation = function () {

  // Get input values from each of the form elements
  var title = $("#talkTitle").val();
  var presenter = $("#talkPresenter").val();
  var link = $("#talkLink").val();

  // Push a new recommendation to the database using those values
  recommendations.push({
    "title": title,
    "presenter": presenter,
    "link": link
  });
};

// When the window is fully loaded, call this function.
// Note: because we are attaching an event listener to a particular HTML element
// in this function, we can't do that until the HTML element in question has
// been loaded. Otherwise, we're attaching our listener to nothing, and no code
// will run when the submit button is clicked.
$(window).load(function () {

  // Find the HTML element with the id recommendationForm, and when the submit
  // event is triggered on that element, call submitRecommendation.
  $("#recommendationForm").submit(submitRecommendation);

});
What’s with that last bit of Javascript, with the $(window).load and functions inside of functions?
 |
What is asynchronous code execution? |
We want to actually submit our recommendation to the database whenever the form is submitted. We use jQuery to listen for the submit event on our form. Whenever that event is triggered (by someone clicking the submit button), jQuery responds by calling the handler function we define — which in this case is submitRecommendation.
In order to actually attach our event listener to the form, we first have to be able to find the form with jQuery. If this Javascript is running before all the HTML elements on our page are fully loaded, the form might not exist yet and we won’t be able to attach our event listener to it.
So, we wait until the window (the page in your browser) is fully loaded with the asynchronous function $(window).load. We pass a callback function to $(window).load that jQuery calls when the window is loaded. Inside that callback function, we find our form using jQuery and then attach an event listener on the submit event.
Want to learn more about how events work in jQuery? Check out this excellent introduction: Events and Event Delegation.
Back to our regular programming:
Refresh application.html again. This time, it shouldn’t auto-save any data to your Firebase. What you’ll see looks a lot prettier, thanks to Bootstrap.
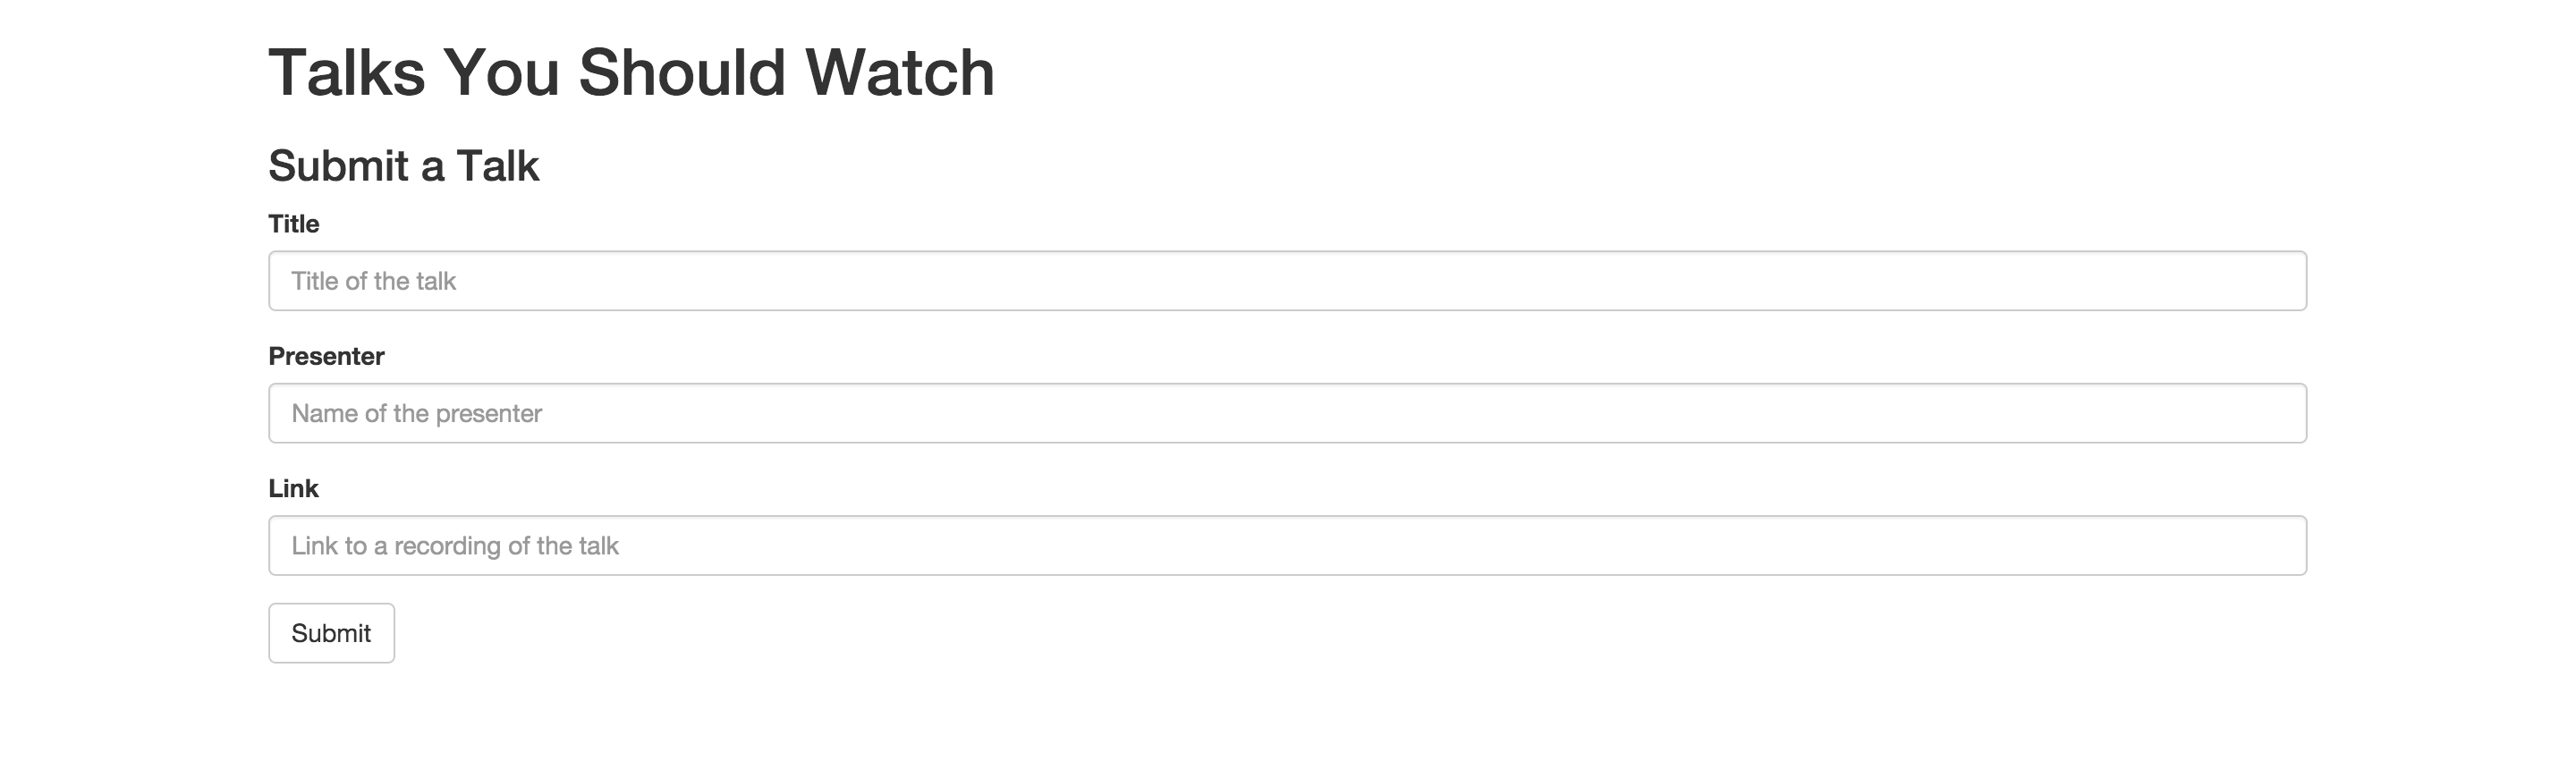
Go ahead and fill out the form. You’ll notice that Bootstrap does some cool magic and will give you an error if you try to submit the form without giving a proper URL for the link input.

When you submit the form, it should clear all the fields, and save your user-generated data to your Firebase!
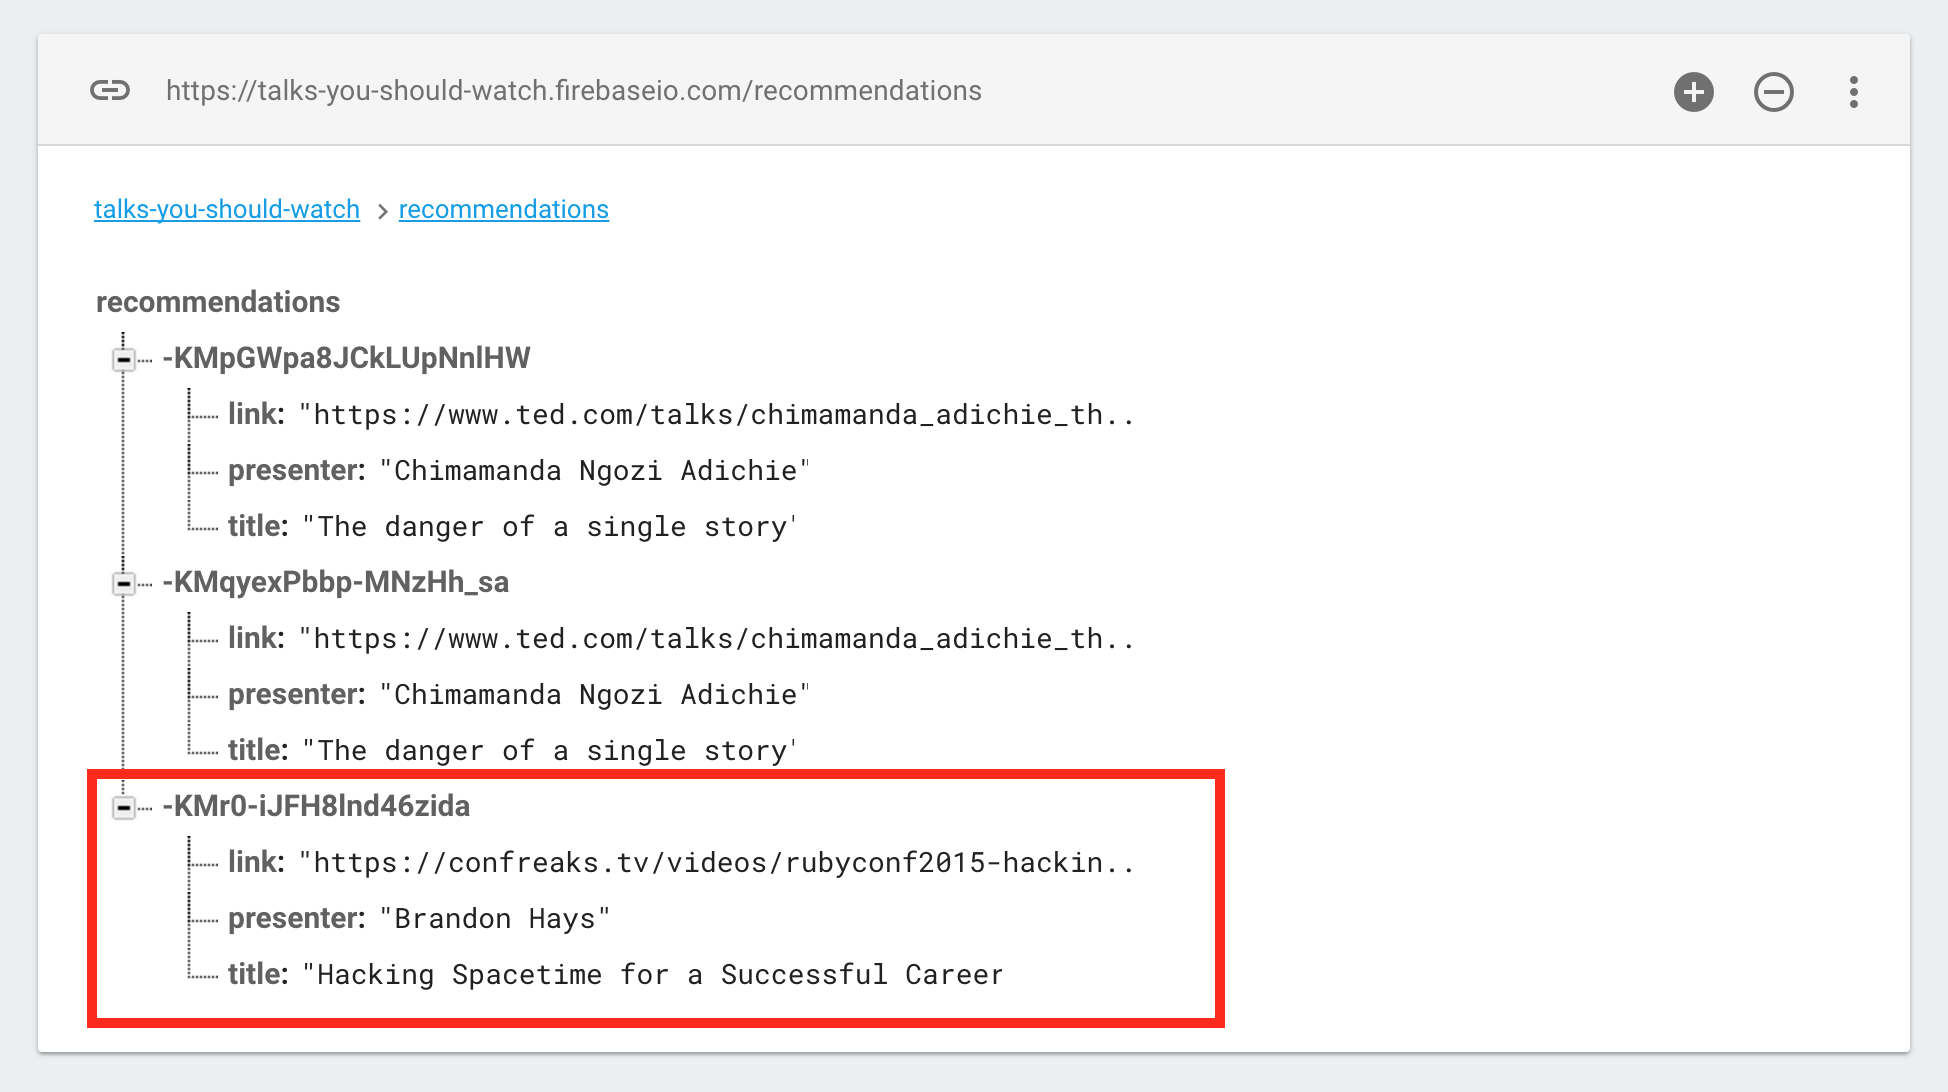
|
You just wrote user-generated data to a database in the cloud! |
EXTRA CREDIT
- For every additional field you defined on recommendations in the Step 3 Extra Credit, add an additional input to the
recommendationsFormHTML.- HTML input types — indicates the types of inputs you can specify with base HTML
- Bootstrap inputs - indicates how you can style inputs with Bootstrap
- For every additional form input you add, use jQuery to get its value and then send that value to your database.
- jQuery selectors - explains how to select different HTML elements using jQuery
- .val() - documentation for the
.val()method of jQuery, commonly used to get or set values of HTML elements
- Add a button outside of the form that, when clicked, sends the form’s input to the database. See if you can do this without rewriting any of the code inside
submitRecommendations.- Events and Event Delegation - excellent introduction to how events work in jQuery
- jQuery events - documentation about all the methods of jQuery related to events
- Add a button that resets the form, and clears all the values in the inputs.
- Determine if a recommendation was saved successfully or if there was an error. Display a message to the user with either a success message or an error message.
- database.Reference.push() - documentation on the
push()method
- database.Reference.push() - documentation on the
AFTER
You understand the basics of asynchronous code execution.
You can use the jQuery library to select and manipulate HTML elements.
You can use the Bootstrap framework to style HTML elements.
You can write dynamic, user-generated data to your database.
Step 5: Read user-generated data