Firebase | Step 1: Setup your first Firebase application
BEFORE
 |
What is a backend and why do I need one? |
DURING
Go to the Firebase website and sign up for an account if you don’t already have one. You can log in with a Google account for easy access.
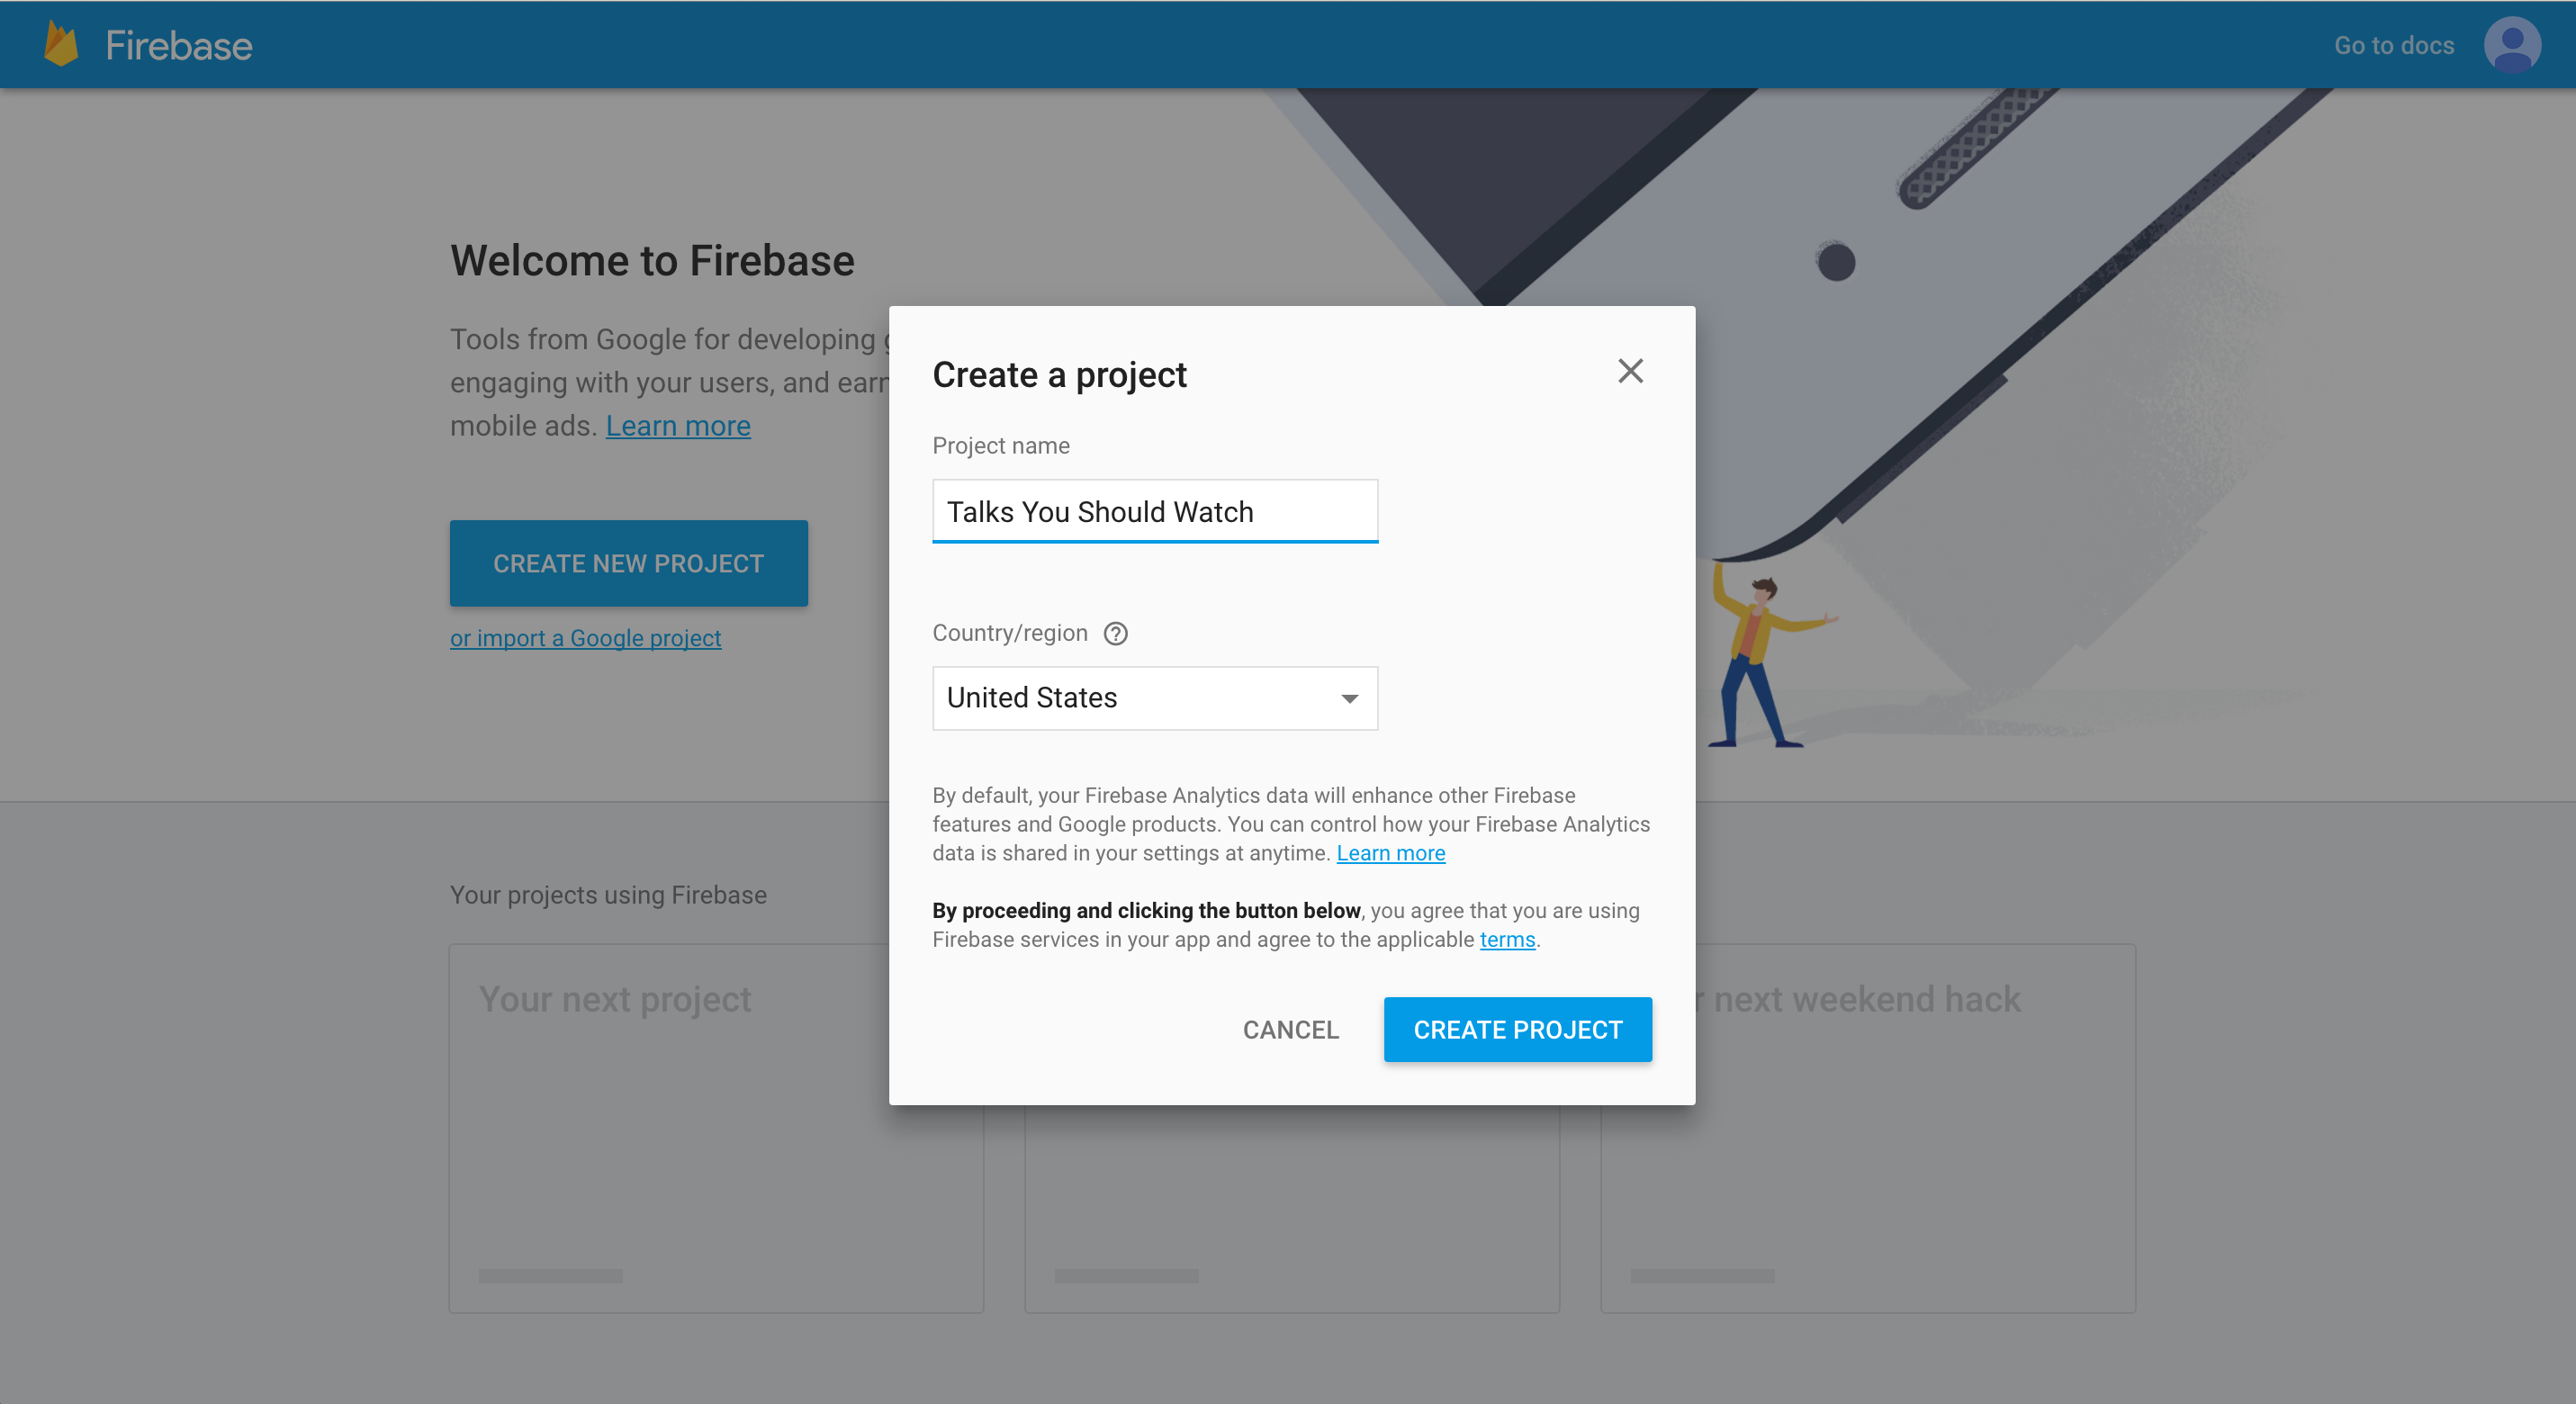
When you log in, you should be directed to the Firebase console. You can manage all of your projects here. Go ahead and create a new one by clicking the blue CREATE NEW PROJECT button.

Give your new project a name.
Once you create your project, you’ll be redirected to your project’s console overview. If you check the URL at the top of your browser, you’ll see something like https://console.firebase.google.com/project/talks-you-should-watch/overview, where the part of the URL after /project/ matches your project’s name.
We’ll refer to that part of the URL as your Project ID. So the project in the screen shots here is named Talks You Should Watch and its Project ID is talks-you-should-watch.
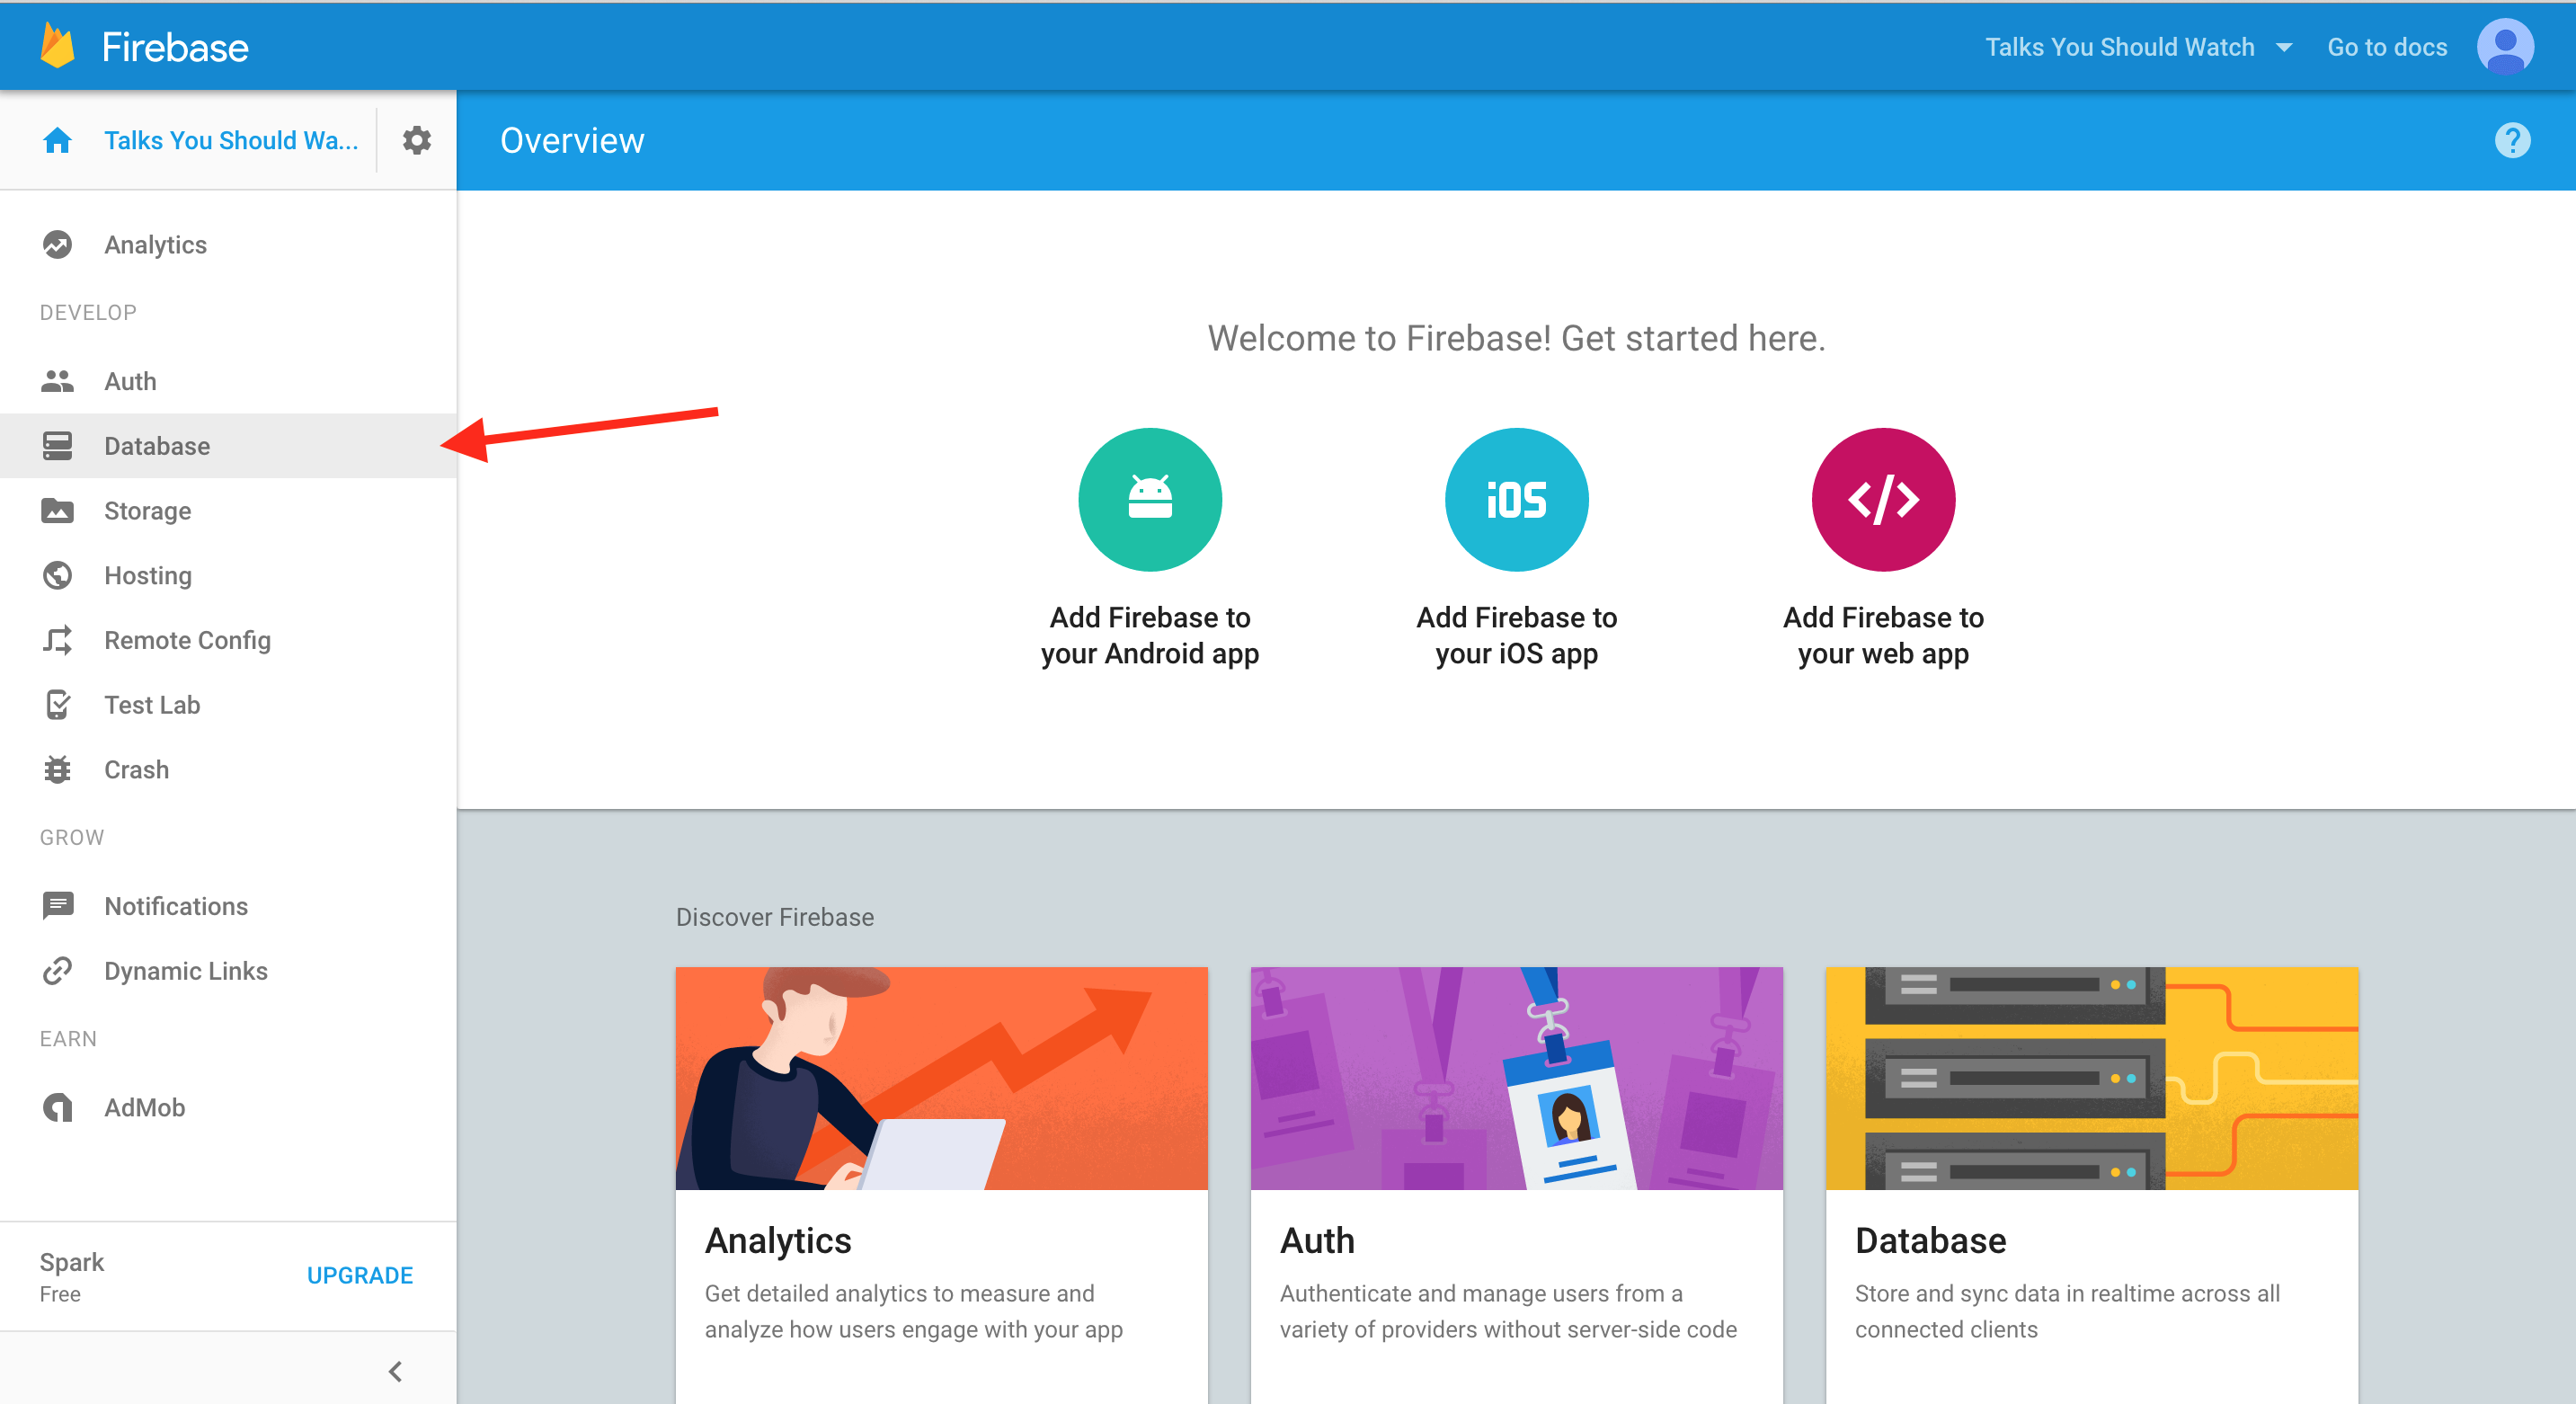
This is where you can come to manage your project. Feel free to explore a bit but when you’re ready to continue with the tutorial, navigate to the Database tab. You should see something like this:
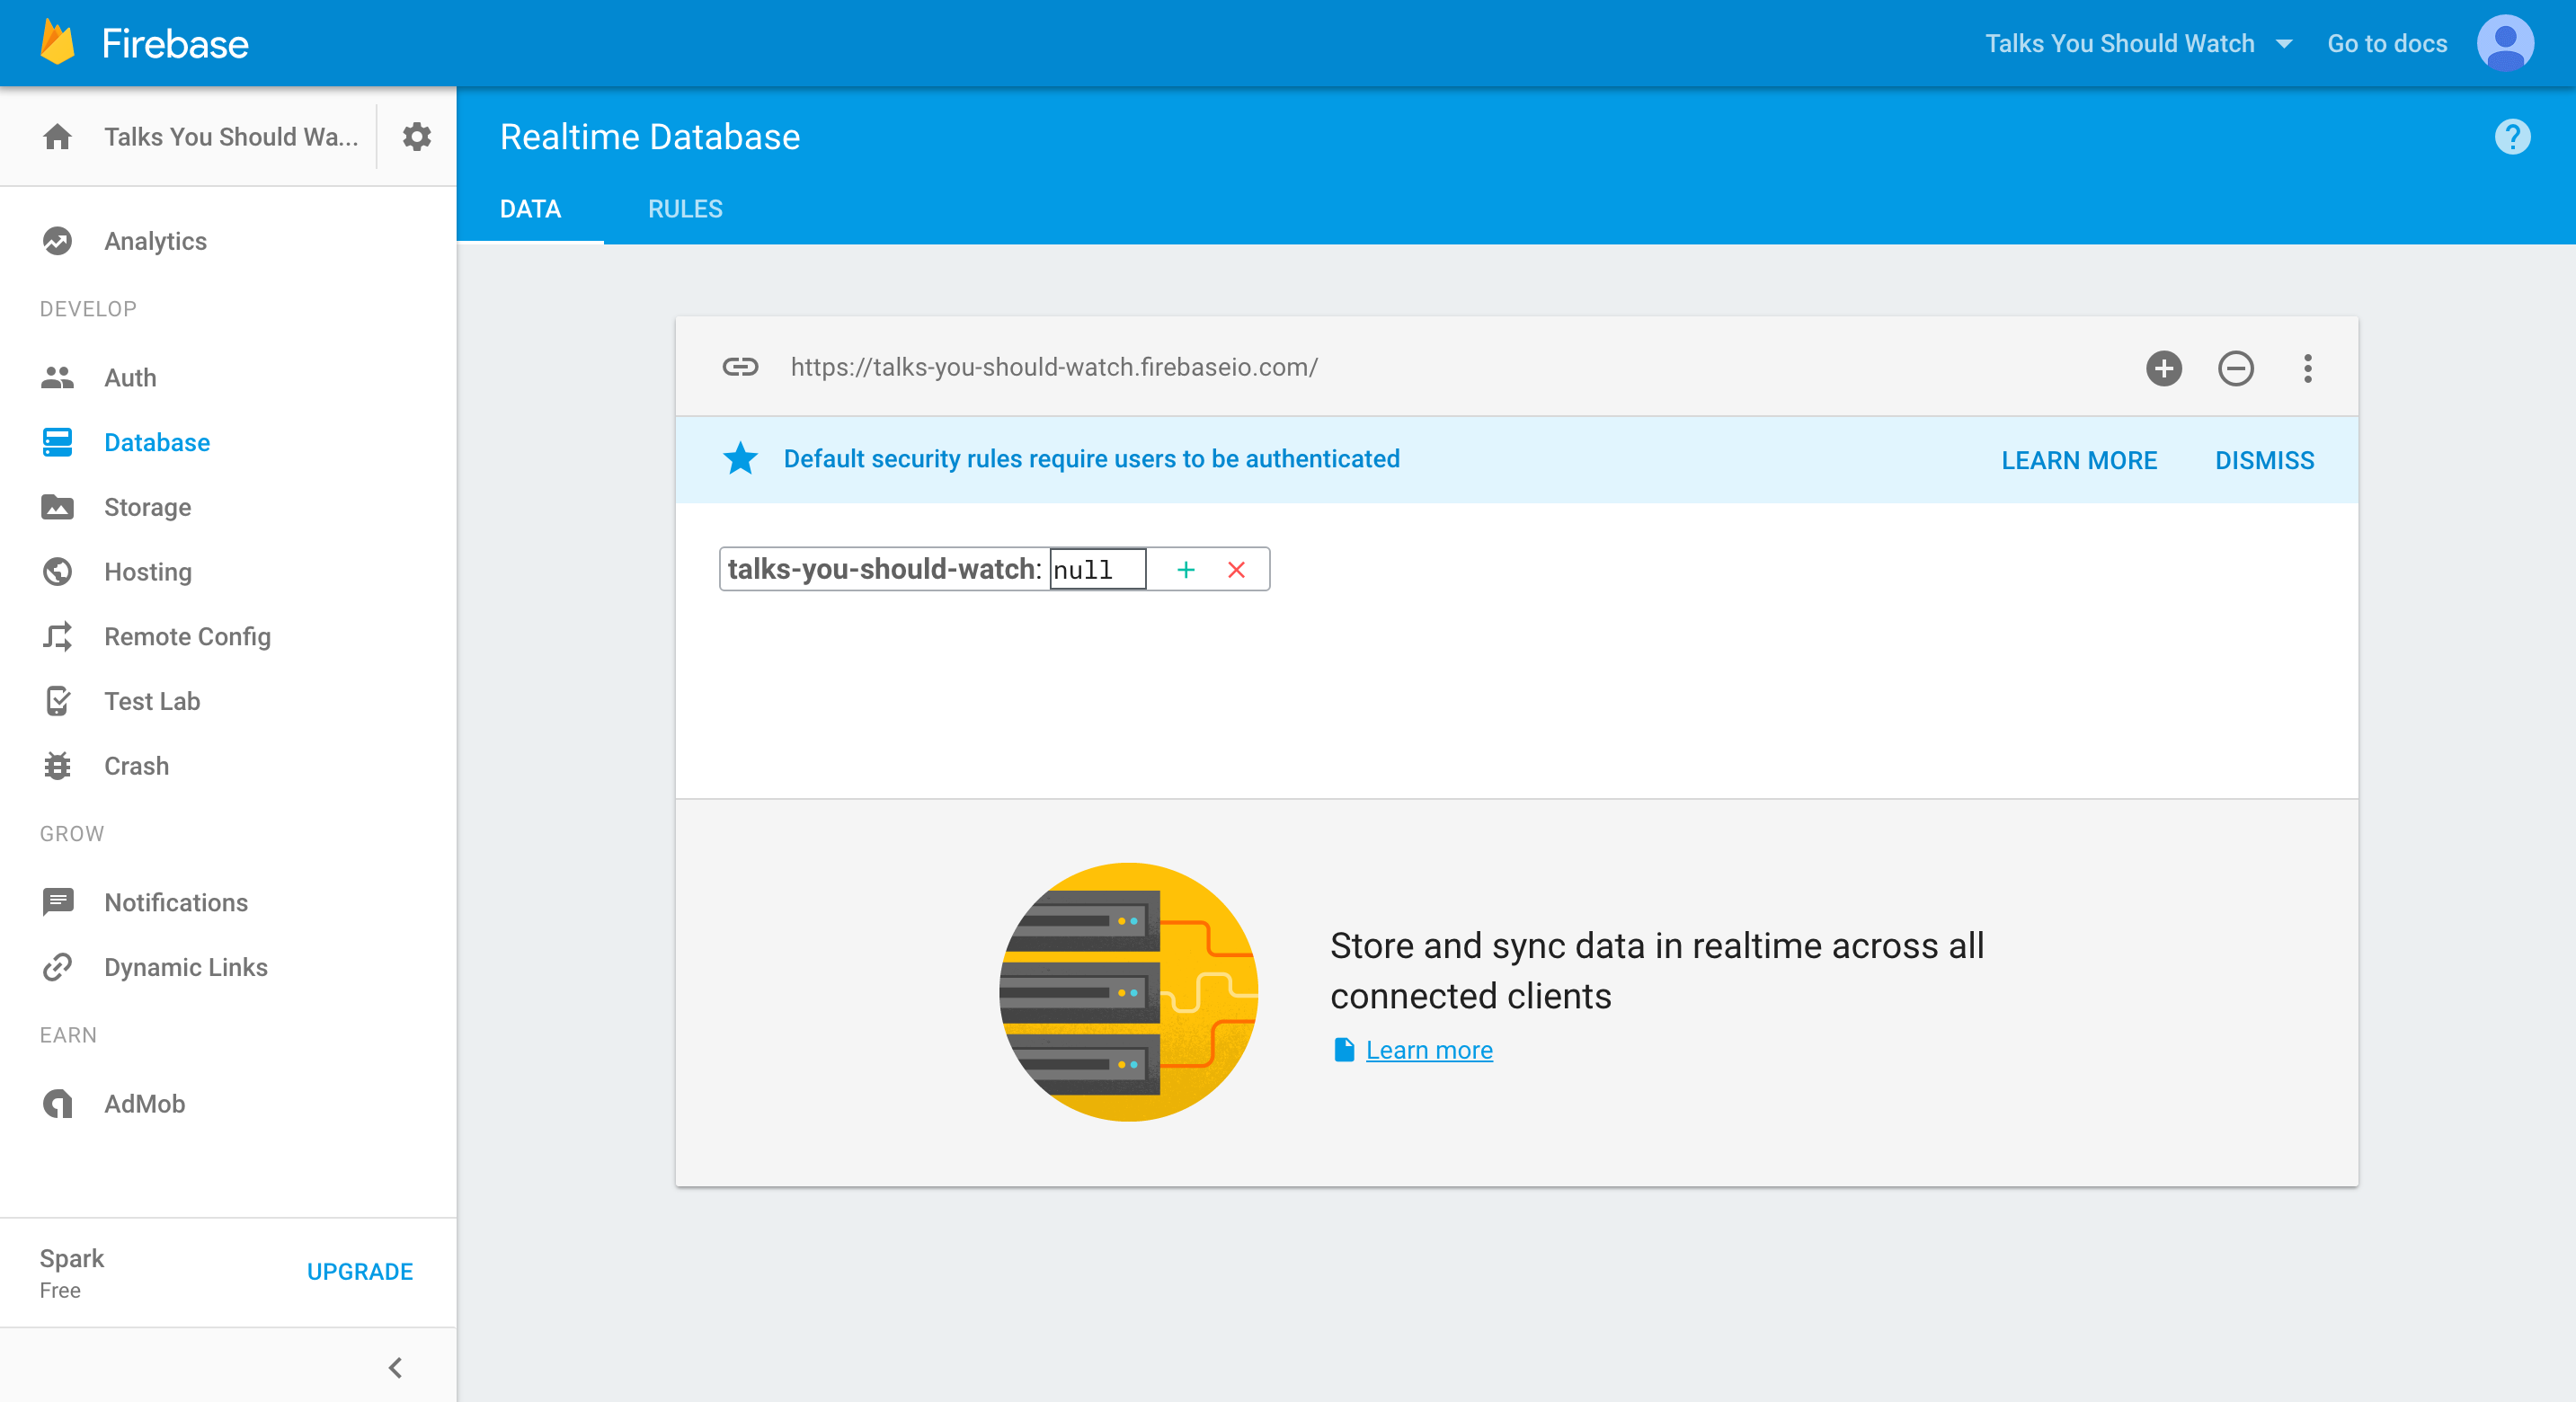
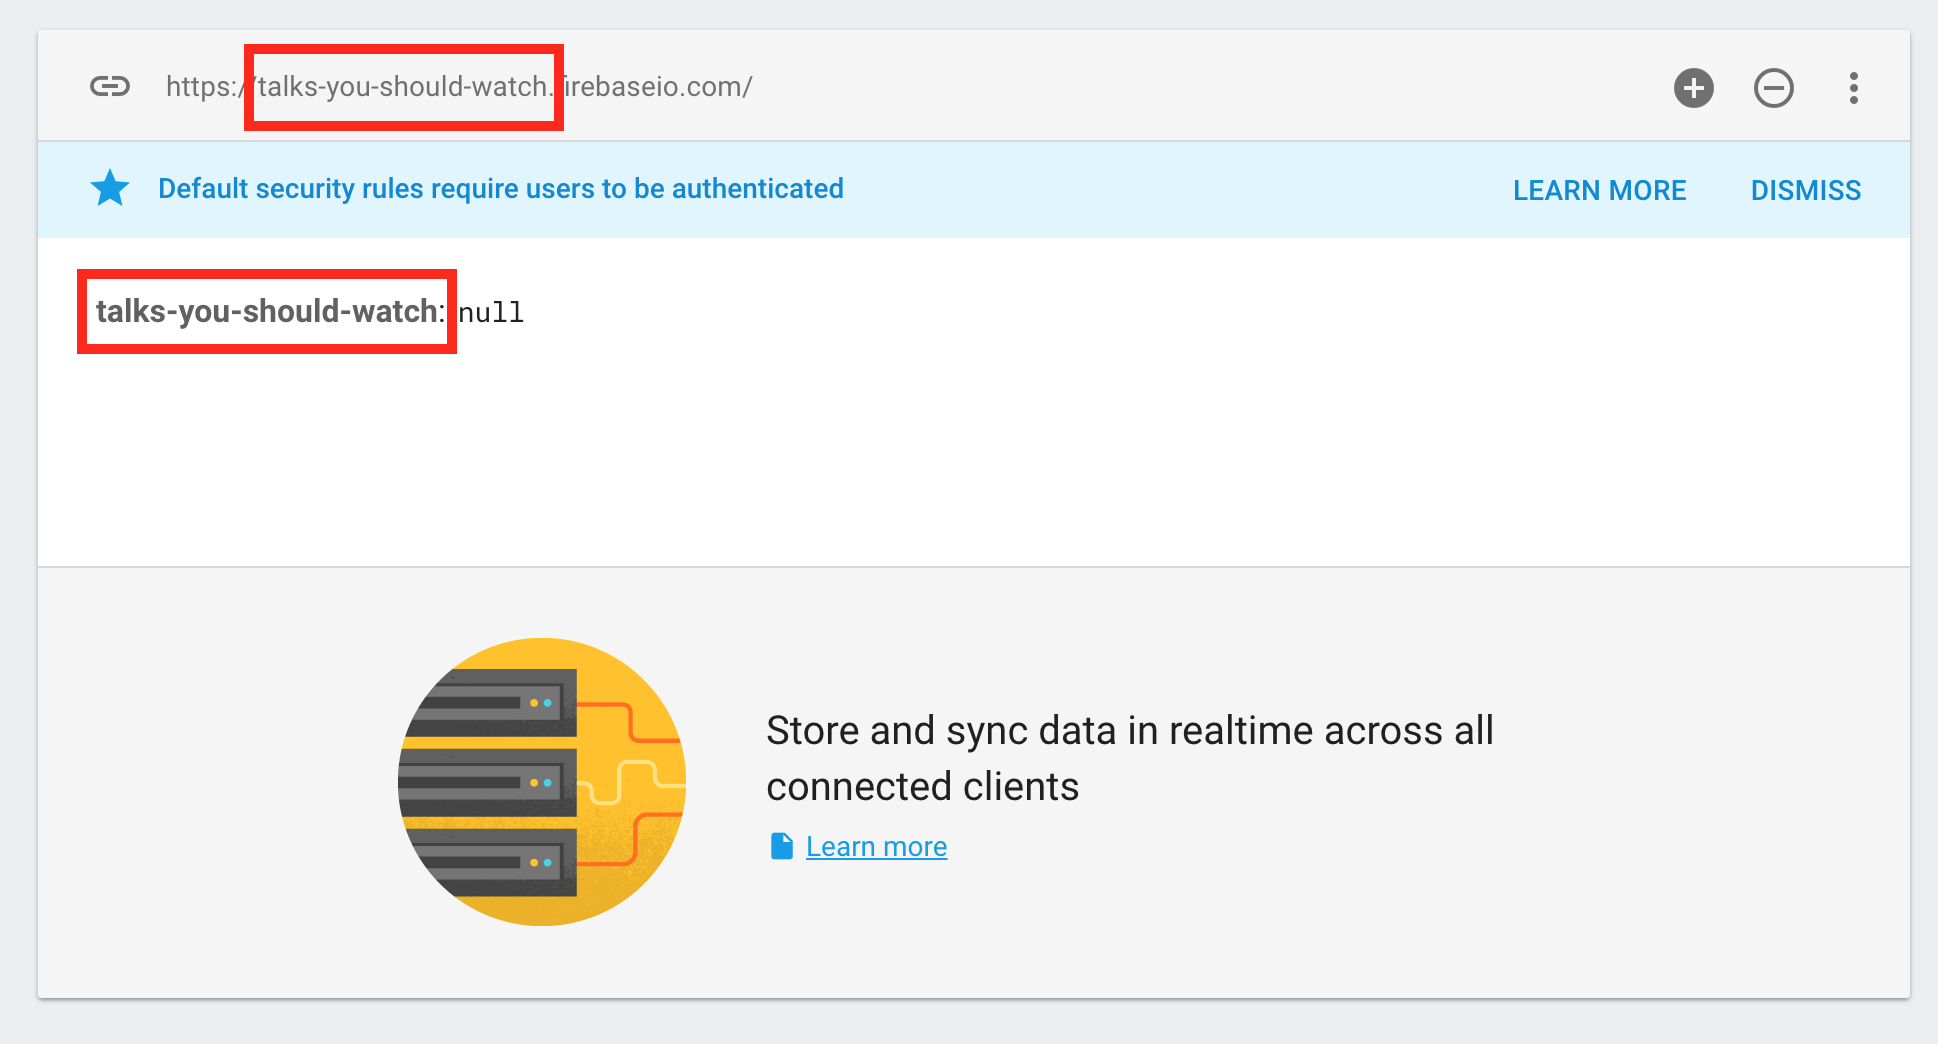
Notice that your Project ID appears in a few places here. There’s a URL that looks something like your-project-id.firebase.io. This is your Firebase URL and it’s pretty important. It describes where to find all the data for this app.
EXTRA CREDIT
- Change your application’s public facing name or project ID. (Hint: you can do this from the settings page for your project.)
- Click around your project’s overview page and learn more about what you can do from this page.
AFTER
You created a Firebase account and your first Firebase project.
You know your-project-id, which uniquely describes your project. You can access your project’s Database console at https://console.firebase.google.com/project/your-project-id/database/data.